Thursday, December 11, 2014

Homemade Face Wash


As per request, I am posting a face wash recipe that is easy to make and free of toxic chemicals.

Homemade Face Wash
1 cup coconut oil
1 tbsp baking soda
5 drops lavender essential oil
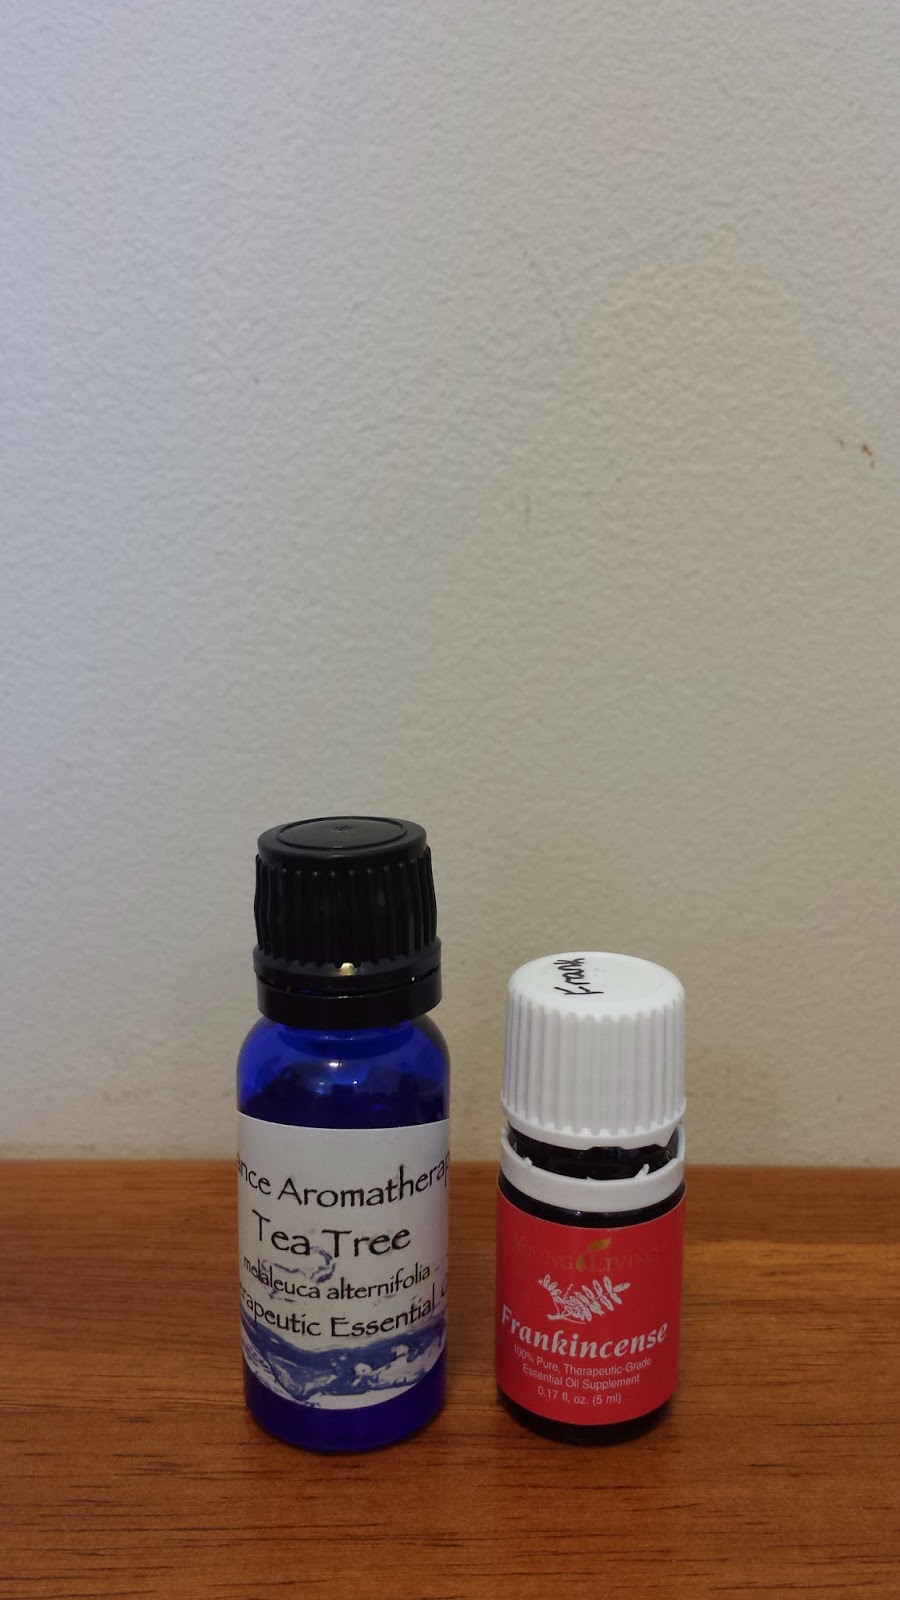
5 drops frankincense essential oil
5 drops lemon essential oil

*for people suffering from acne, replace the frankincense and lemon with 10 drops of melaleuca (tea tree) essential oil 

Melt the coconut oil in a pan over low heat. Once melted, remove from heat and add remaining ingredients.

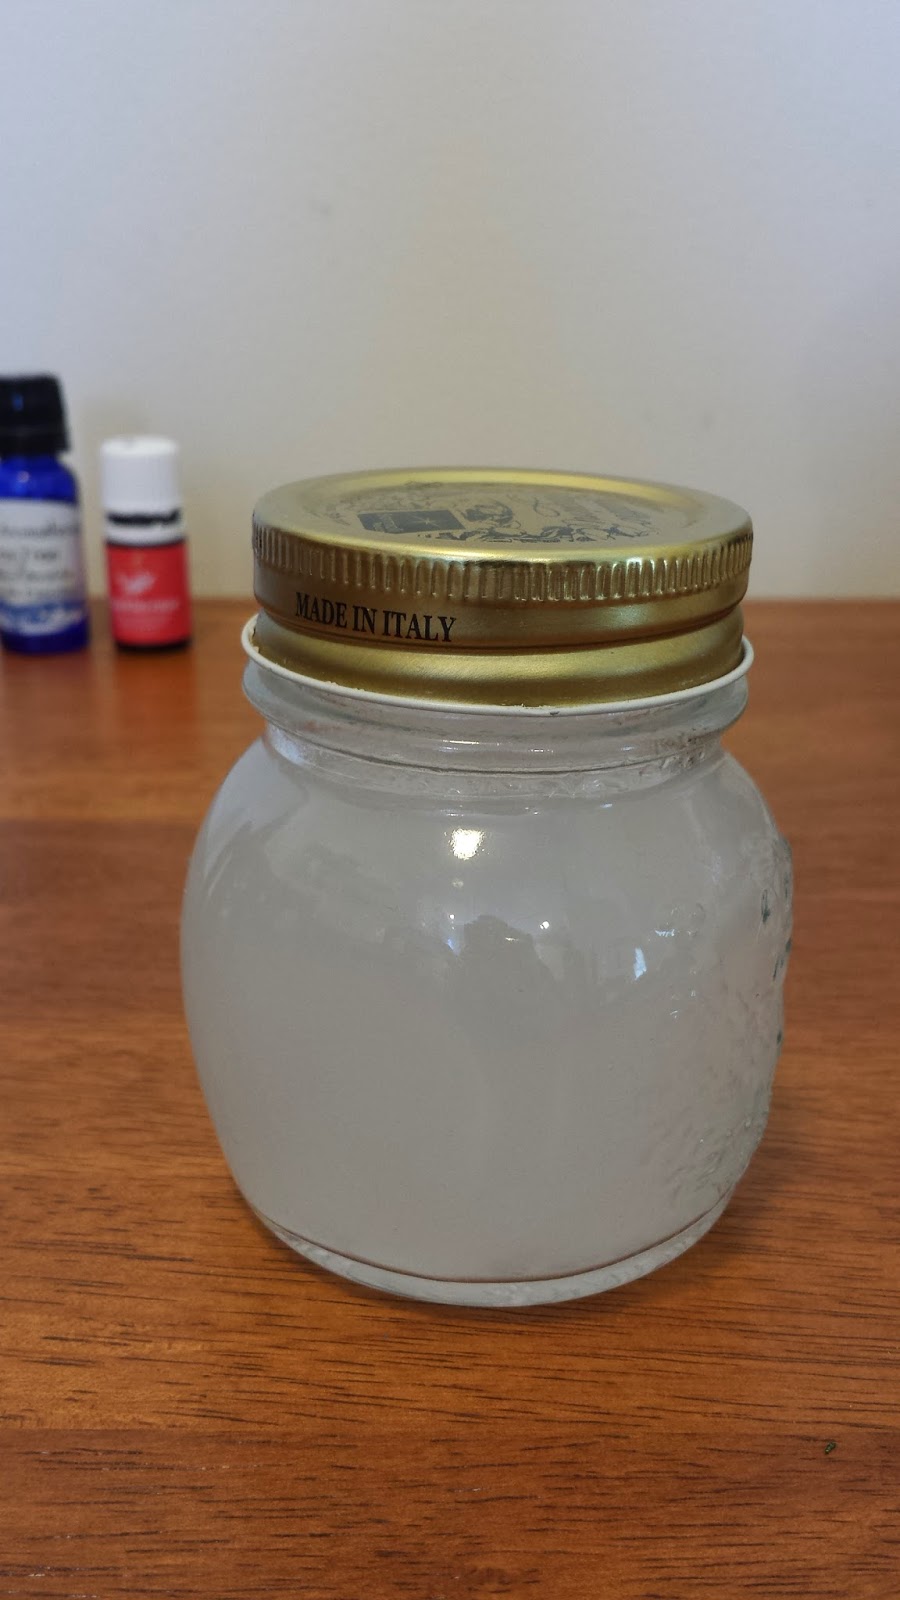
Store the face wash in an air tight glass jar. Please use glass, not plastic as the concentrated strength will strip the plastic putting toxins into your once non-toxic face wash.

The essential oils and coconut oil work together to kill any bacteria while keeping your skin hydrated and feeling health and clean.

Please note: I only recommend using Young Living essential oils as they are pure, therapeutic grade essential oils and therefore are safe to use topically. I can not vouch for the safety of any other brands of oils and therefore can not recommend their topical application.

Let me know if you give the recipe a try and what you think! 

Feel free to contact me anytime with questions on this or any other recipe, or how to buy Young Living essential oils. 

post inspired by http://draxe.com/


Thursday, November 13, 2014

Holiday Yummies for your body!

Can you believe it is mid November!?!? If you are as shocked as I am, chances are you also didn't realize that Christmas is six weeks away! Did you just panic? Are you breaking into a cold sweat thinking of  those people you never quite know how to shop for? Well, lucky for you, I have a solution!
Whipped Body Butter!!

It's so easy to make, easy to give as a gift, and smells so yummy! Here are a few great recipes you can try!

Mint Chocolate Body Butter
 - 1/2 cup cocoa butter
 - 1/2 cup coconut oil
 - 20 drops peppermint essential oil

Step 1
In a double boiler combine all ingredients except essential oils. Bring to medium heat and stir constantly until melted. Remove from heat and let cool slightly before adding the essential oils. 

Step 2
Refrigerate for about an hour or until the mixture just starts to harden but is still somewhat soft.

Step 3 
Use electric mixer to whip for 10 minutes until light and fluffy

Step 4
Spoon the whipped butter into a glass jar or container and store in fridge for about 10 - 15 minutes to set

Step 5 
Use it for your self or give it away! But most importantly... enjoy!!! (Let me know if you try this or any other recipes and what your thoughts are!)

Follow the steps above for any of these other recipes!

Chocolate Orange Body Butter
(yes mom, this one is for you)
 - 1/2 cup cocoa butter
 - 1/2 cup coconut oil
 - 20 drops orange essential oil

Key Lime Body Butter
 - 1 cup coconut oil
 - 2 tablespoons aloe vera gel
 - 20 drops lime essential oil

Orange Cream Body Butter
 - 1 cup coconut oil
 - 2 tablespoons almond oil
 - 20 drops orange essential oil

Wintergreen Body Butter (can also act as a pain relief, add 20-40 drops of wintergreen)
 - 1/2 cup coconut oil
 - 1/2 cup shea butter

Calming Body Butter
 - 1/2 cup coconut oil
 - 1/2 cup shea butter

Energizing Body Butter
 - 1 cup coconut oil
 - 2 table spoons aloe vera gel

Or feel free to experiment with your own recipe of your favorite essential oils! Happy whipping!

Tuesday, November 11, 2014

Allergy Relief

It's that time of year again, when allergies are in full swing and we forget how it feels to breathe clearly. If you are anything like me, your stuffy nose will soon travel to your chest and you're just a disaster of sneezing, coughing and sniffles. Would you believe I have found a natural remedy for allergies?


That's right! Essential oils can bring relief and even get rid of the allergy entirely!

Lavender clears congestion, builds immunity, relieves headaches, eases muscle pain, and is a natural antihistamine

Lemon helps protect immunity, alkalizes the body, and relieves excess mucous

Peppermint helps to ease breathing, fights infection, helps congestion, relieves headache and opens airways instantly

How do you use these Young Living essential oils?

Topically - apply 1 drop to forhead, soles of feet and sinuses as needed
(don't get essential oils in your eyes. If you do, do not use water to rinse. Water strengthens the oils and will only intensify your discomfort. Instead, massage a vegetable oil, like olive oil or coconut oil, around the eyes to draw out the oil and soothe the irritation.)

Inhalation - apply 1-2 drops of oil to the palm of your hand, rub your hands together and cup them over your nose and inhale deeply. Diffuse your essential oils during the day or while you sleep

Ingestion -  put 5 drops of your oil of choice in a capsule with vegetable oil such as coconut oil, or if you are having a particularly bad allergy attack, you can use the Allergy Bomb recipe:


Take it from someone who has suffered from seasonal allergies her entire life, this really works! 

Please don't try my remedy suggestions with any brand of essential oil other than Young Living. I only use myself and suggest others to use the Young Living Essential Oils because they are the best oils on the market today. This is the only company that controls the entire seed to seal process right from their own farms. I can not vouch for any other brand of oil nor recommend their use safely.

Feel free to contact me with any questions or to inquire about how to order your own essential oils. 


Have a wonderful day!

Thursday, November 6, 2014

DIY Bug Spray (chemical free!)

Here is my all natural buy spray recipe:
8 oz spray bottle
4 oz Distilled water
4 oz Unscented witch hazel
10 drops Purification® essential oil blend

Works like a charm to keep those pesky bugs away!

Contact me for more information about Young Living essential oils and how to order.

Tuesday, November 4, 2014

Exfoliating Scrub

Super easy and yummy exfoliator!

1/2 cup white sugar
1/2 cup coconut oil
10 drops Essential Oil


Mix 1/2 cup white sugar with 1/2 cup coconut oil and 10 drops of your favorite essential oil. Rub onto hands and feet, then rinse and pat dry.

Yup, it's that simple! Enjoy! 

Tuesday, June 24, 2014

Lip Balm - smells so delicious you'll want to eat it

If you can't ingest it, you shouldn't put it on your skin. "Chapstick" brand lip balm contains 11 chemicals that have not been assessed for safety in cosmetic formulas. "Blistex" lip balm scores a 9 out of 12 in toxic parameters and contains two carcinogens with linkage to cancer.

Now I know if we were to avoid everything that "may lead to cancer" we would be living in a organic recycled bubble with no contact to the outside world, so let's not go on a crazy rampage here.

BUT! If you had the choice between

A. lip balm made in a factory with ingredients that you aren't really sure of, through a process that you don't really know by people (or machines) that you have never met...

OR

B. lip balm made in your own kitchen with ingredients that you not only know but also are safe to eat, through a process that you can not only see but are completing with your own two trusted hands!

You're right... I would choose B also. Did you know that most chapstick companies put alcohol in their products? Alcohol draws the moisture out of your skin and brings it to the surface where the chapstick holds it in place until it evaporates. Then your lips end up dryer than they were before. Have you ever noticed that the more you use chapstick the more you need to use chapstick? Coincidence? I think not.

Here is my recipe for a fabulous smelling lip balm that is easy to make and not only feels great but heals chapped lips by adding moisture to the skin.

Home Made Lip Balm
2 teaspoons beeswax
2 teaspoons coconut oil
1/4 teaspoon vitamin E oil
2 tablespoons sweet almond oil
2 drops peppermint essential oil


Place the beeswax, coconut oil, vitamin E oil, and almond oil in a small pot over medium heat. Stir until melted, then remove from heat. Slowly stir in the essential oil.* Slowly pour into a sealable, sterile glass container. Let it cool and solidify before using.

*I used peppermint essential oil because of the cooling effect on the skin and it's pain relieving qualities. You may substitute your own choice of essential oil for different a scent or healing properties. I also recommend Lavender essential oil for it's great scent but also fast and effective healing properties. 

*Make sure you use a therapeutic grade essential oil that is safe to use topically but also safe to ingest. A lot of essential oil companies warn you to not ingest their product, this oil is not therapeutic grade and therefor not safe to use for anything other than aromatherapy. I use Young Living essential oils because they have 100% therapeutic grade oils confirmed with their "seed to seal" promise.

I hope you love this lip balm, I use it every day! It feels so good and smells so tasty! Let me know if you try it, and if you add or alter any of the ingredients please share your experience in the comments below!! And, as always, please feel free to contact me about Young Living essential oils and how to order them with wholesale prices. 

Recipe inspired by The Home Apothecary

Have a wonderful day! 

Monday, May 26, 2014

Sunburn relief!!!

When a day of this...


...turns into this...


You need this:


Here is my very own sunburn relief concoction! 

2 tbs Organic Virgin Coconut Oil (or any other carrier oil you may prefer)
2 tbs Aloe Vera Gel
10 drops Lavender Essential Oil
5 drops Peppermint Essential Oil

Sunburned skin need to stay moisturized!! Coconut Oil and Aloe Vera Gel will keep your skin hydrated and hold in the moisture for hours on end! (especially if you lather it on like I do!)

Lavender essential oil is highly regarded for healing and soothing skin irritations, cuts, bruises, minor burns, etc.

Peppermint essential oil eases pain and discomfort when applied to the skin while offering a cooling effect (works great for fevers and hot flashes as well)

When using essential oils directly on your skin you need to make sure your oils are pure, therapeutic grade, essential oils, such as Young Living. If you have any questions about Young Living oils or would like information on how to order them, please feel free to contact me!

Sunday, April 13, 2014

Smoothie Sunday : Orange Almond Swirl

What a beautiful day for smoothie sunday! 75 degrees in the middle of April? I'll take it! Here is today's recipe, trust me, it is amazing.

Orange Almond Swirl Smoothie
1 cup almond milk (I use vanilla)
2 peaches cut into chunks
1/2 cups kale (don't judge, just try it)
1 tsp pure vanilla extract
1/2 tsp pure almond extract
6 ice cubes (or cut the peaches the day before and toss them in the freezer overnight to eliminate the need for ice)


Combine all ingredients in a blender and BLEND baby BLEND. Of course if you are afraid of adding greens to your smoothie, you can always eliminate the kale. Please try it! Let me know what you think!


Tuesday, April 8, 2014

Detox Water

Drink one or two glasses of this water a day for a great detox

Detox Water Recipe
1 lemon sliced
1/2 cucumber sliced
10 fresh mint leaves
About 12 cups water


Allow the lemon, cucumber and mint to sit in the water for 24 hours.

Lemon water makes for a powerful detox drink; lemon juice helps to cleanse and alkalize the body. Add one thinly sliced lemon to a large pitcher, or squeeze fresh lemon juice into your glass. Lemon also aides in digestion and boosts your immune system.

Mint adds a touch of sweetness without the sugar, and it also helps settle your stomach and aids in digestion.

Adding a few slices of cucumber to your water makes for excellent re-hydration, and cucumber contains anti-inflammatory properties.

All Natural Face Primer

By Casey's request, here is an all natural recipe that wont clog pores.

Face Primer Recipe
1 Tablespoon aloe vera gel
1/4 teaspoon kaolin clay
1/4 teaspoon arrowroot powder


Mix the clay and the arrowroot powder together in a small bowl. Next, add the aloe vera and mix thoroughly. Apply a thin layer to your face and allow it to set for a few minutes before applying makeup. You could add a tiny bit of mineral makeup if you want your primer to have a tint.

Keep mixture in a jar in the refrigerator to extend the shelf life of the aloe vera. (Can be used up to 2-3 weeks) If you do not want to have to refrigerate it, then you can use lotion instead of aloe vera gel.

Kaolin clay is used in this recipe for its healing mineral content and its anti inflammatory properties. Both the clay and the arrowroot powder absorb excess oil and therefor produce a matte finish.

Please try it out and let me know what you think!


Friday, April 4, 2014

Household Cleaners

As requested by my friend Tori, here are some recipes for chemical free household cleaners.

*Notice the use of essential oils in each recipe, that is because essential oils not only smell great while they disinfect, they also heal while they disinfect! I am a Young Living Essential Oils distributor, so if you are interested in getting your hands on some, please feel free to email me or leave your email address in a comment!

Disinfectant:
2 tablespoons white vinegar
1 teaspoon Borax
10 drops Eucalyptus, Lemon, or Lavender essential oil
Combine in spray bottle and fill with hot, distilled water. Shake vigorously until borax is dissolved completely

Floor Cleaner:
1/4 cup white vinegar
1 bucket of hot, distilled water
5-10 drops of Lemon, Melaleuca (aka tea tree), or Purification essential oil
Combine in bucket and mop away!

Air Freshener:
12 drops Lavender, Lemon, or Eucalyptus (or a combination)
1 quart distilled water
Put in spray bottle and shake well before using.

Window Cleaner
1 cup white vinegar
3 cups distilled water
10-15 drops Lemon essential oil
Mix ingredients in a spray bottle and clean!

And just in time for spring! Happy cleaning!!!

Tuesday, March 18, 2014

Cucumber Eye Cream

Didn't get enough sleep last night? Eyes all puffy with dark bags underneath? Tired of using store bought creams that promise fresh looking eyes, yet never deliver results? (I'm not even going to get into the fact that the last one is probably due to chemicals instead of using the beautiful earth God gave us!! Okay, I will step down from my soap box now)

Have I got the recipe for you!!! It works and it feels great, especially first thing in the morning when your eyes are all crusty and hot from sleep!

Cucumber Eye Cream
1 Tablespoon Aloe Vera Gel
1 teaspoon Cucumber juice (best when fresh, if you have a juicer)
1/4 teaspoon cornstarch
1/2 Tablespoon witch hazel


Directions: 
1. In a double boiler (I do not have a double boiler so I just used a pan on very super low heat... no "very super low" is not a heat setting on my stove, but you get the idea) combine the aloe gel, cucumber juice, and cornstarch and warm carefully. Do not overheat or bring to a boil. 

2. When ingredients are mixed together (it should be a light pastel greenish color) remove from stove, transfer to a bowl and mix in the witch hazel (the recipe in the book called for 1 tablespoon but I found that to be to watery so I cut it back to 1/2 tablespoon). 

3. Allow to cool completely before transferring the mixture to a sterile container, and store in the fridge. This gel will last about a week. 


To Use:
Apply under the eye in an upward, dotting motion, be careful not to pull on the skin.

I think this is my favorite recipe so far. It smells great, was fairly simple to make, and the coolness of the refrigerated gel feels great under the eyes!

Don't be intimidated by the use of a stove, this really is easy. Please give it a try and let me know what you think!

Aloe Face Toner

Aloe Face Toner Recipe
1/2 cup distilled water
1/4 cup witch hazel
1 teaspoon aloe vera gel*
10 drops tea tree essential oil
10 drops frankincense essential oil


 or 

* I have an Aloe Vera plant so sometimes I will choose to use fresh leaves (click here for a how to), however I don't want to kill my plant by taking too much from it at once, so I bought 99% pure Aloe Vera Gel from the a whole food store.

Directions are simple:
1. Mix all the ingredients together. 
2. Pour the mixture into a sterile container.

To Use: 
After cleansing your face, moisten a cotton facial pad with toner. Wipe face gently, avoiding eyes. Follow with moisturizer.

I got this recipe from The Home Apothecary 1 but added my own variations. 

First: The recipe called for 3/4 teaspoon aloe vera gel. I used 1 teaspoon simply because I have a problem with acne and wanted more healing agents in my toner.

Second: the recipe called for 5 drops black willow essential oil and 5 drops thyme essential oil, I used 10 drops Frankincense essential oil because I have had great experience using frankincense as a healing agent, specifically for acne.

Sunday, March 16, 2014

Smoothie Sunday: Chocolate Chimp

Smoothie Sunday is here, and today's featured drink is a mixture of fruit, veggie, and a little bit of guilt. The recipe was taken from the Big Book of Juices & Green Smoothies 3 but I altered it a little.

Chocolate Chimp Recipe
1 frozen banana
1 Tablespoon cocoa powder
2 Tablespoons peanut butter
1/2 cup loosely packed baby spinach
1/2 cup vanilla almond milk


If you are not used to green smoothies you are probably thinking, "spinach? Ewwww" but I promise you, you can't even taste the spinach once you blend it all together. At least try it once and if you don't like it, just exclude the spinach next time, but the vitamins and health benefits are well worth it! 

First alteration: the recipe called for 1 Tablespoon peanut butter, but my husband and I are peanut butter junkies so we think it tastes much better with two. 

Second: the recipe also called for 1 Tablespoon Cocoa powder and 1/2 cup Almond milk (I used vanilla) but you could also use Dark Chocolate Almond milk and exclude the cocoa powder. 

Thirdly: the recipe calls for stevia in almost all of the smoothies, (in this case it was 1-2 drops) but I just used sweetened almond milk and I found the taste was plenty sweet without the stevia. 

Lastly: the recipe called for 6 ice cubes, but I used a frozen banana instead. If you peel and slice the banana into chunks, you can store it in the freezer until you are ready to make your smoothie. Doing this eliminates the need for ice.


Give it a try and let me know what you think!


Sunday, March 9, 2014

Acne Spot Treatment

Are you an adult still struggling with acne? I thought this problem would go away when I entered adulthood?!? Well, it didn't... and for a long time I was struggling with awful breakouts and nothing seemed to work. Until, I took matters into my own hands and started to make my own products. Here is a simple and great smelling recipe for acne breakouts:

Acne Spot Treatment

1 tablespoon (20g) organic honey
1 teaspoon neem oil
5 drops tea tree essential oil
5 drops *frankincense essential oil


Blend all the ingredients together well and store in a sterile container, preferably in the refrigerator. To use, dab a small amount on the affected area.


I got this recipe from The Home Apothecary 1

* They called for goldenseal leaf essential oil. I substituted with Frankinsense essential oil which also works well for acne.


If you have any questions about essential oils, because I have not yet posted about the importance in choosing the right oils, please feel free to contact me. I am also a distributor of Young Living Oils, which are the oils I will be using in all my recipes. I would be happy to order oils for anyone who is interested. Just sent me an email with your questions or requests, or post a comment with your questions and your email address.

SMOOTHIE SUNDAY: Oats & Honey

Also known as the best recipe I have ever created, this smoothie is not only delicious but it's also easy to make!

Oat and Honey Smoothie Recipe: 

1/4 cup oats
2 Tablespoons raw organic honey (best if locally made)
2 teaspoons ground cinnamon
1 frozen banana
1 cup vanilla almond milk


OR 

You can use dark chocolate almond milk (which my husband prefers)


Seriously, it tastes so great! If you drank too much last night, and are suffering the next day from an alcohol induced headache/stomach ache, this smoothie will actually help calm down a hangover.

My #1 tip for making smoothies: freeze your bananas so you don't have to use ice and therefore water down the flavor.

Please let me know how you like this recipe! Have a great Sunday.

Friday, February 28, 2014

Give Away!!!

If you are new to my blog, welcome and thanks for stopping by! I wanted to create this blog, not only to share my experiments with making my own natural products and dabbling with homeopathic remedies, but also to meet other people with the same interests.

I would love to hear your story! How long have you been living this lifestyle and what was it that turned you on to it? Or maybe you are just starting to develop an interest, what made you want to give it a try? I would love to hear alternative ideas and suggestions, recipes you love or hate, and topics you would like to see me post about in the future! (Any comments on this post answering those questions will also get you an entry in the contest mentioned below!!!)

Some post topics to look forward to: 
essential oils
reusing items around the house that you would normally throw away
food recipes
herbal remedies
juicing recipes
and of course home made, all natural beauty and hygienic products

If you aren't already aware, Wall-to-Wall Books (aka my mom) is doing a give away on her blog to win this book:

To Enter to Win:
- Comment on two different posts from my blog
- Sign up to be a follower
- Sign up for email alerts

Doing one of the above will get you one entry!
Doing two will get you two entries
Doing all three will get you three entries!

When you have made your entry, make sure you go to 
and fill out the form in order to make your entry valid! 

Thanks for coming and I'm looking forward to meeting/getting to know you all!

Saturday, February 22, 2014

Aloe Face Cream

You've probably heard of Aloe Vera gel, most likely while looking for a sunburn remedy, but did you know Aloe Vera can also be used as an acne fighting moisturizer? The gel inside the leaves of the Aloe plant has natural healing properties and regenerates damaged tissues without harming sensitive skin.


Aloe Face Cream Recipe:
3 - 4 medium sized Aloe leaves
1 Tablespoon Base Oil* 
1 Tablespoon of distilled water
1/2 Tablespoon of Witch Hazel
2-4 drops Vitamin E oil
2-4 drops Tea Tree oil

*see list below of which oil to use for your skin type


Step 1
Remove the gel from the leaf. If you don't know how to do that, click here for a great (and slightly adorable) tutorial. Of course our leaves are much, much smaller than his, but same technique is applied.


Step 2
Rinse the sticky, yellow, gooey stuff (also known as aloin) from your gel. This goop is not harmful but has a gross smell and can be irritating to the skin. (It actually can be used as a laxative.)


Step 3
Put the Aloe gel in a blender (I used a bullet), add the rest of your ingredients and blend! Pour mixture in a jar and VOILA: face cream. Store jar in refrigerator. In theory this mixture should stay good for 6 - 8 months but you will most likely use it up before that point.


*Base Oils for your skin type
Acne Prone : Hazelnut or Sunflower oil
Oily Skin: Sunflower, Grapeseed, or Almond Oil
Normal Skin: Jojoba, Grapeseed or Apricot Kernel Oil
Dry Skin:  Apricot Kernel or Avocado Oil

If you are planing on using an oil based face cream for the first time, you might find that you have an oily film on your skin. I added the witch hazel for this reason, but you can also let the cream soak into your skin for a few minutes and then wipe off any excess oils with a clean towel. If you find the excess oil is causing you to break out (the very thing we are trying to remedy) then just play around with using different oils, different combinations, and different amounts. If the oils are truly bothering your skin but you still want the healing effects of Aloe Vera, just blend the gel into a paste and use that as an acne fighting agent without adding any moisturizing ingredients.